|
|
|
|
|
|
|||
|
PlotCalc:
18.06.2026
PlotCalc 2026.06.18 [more..]
[all list] |
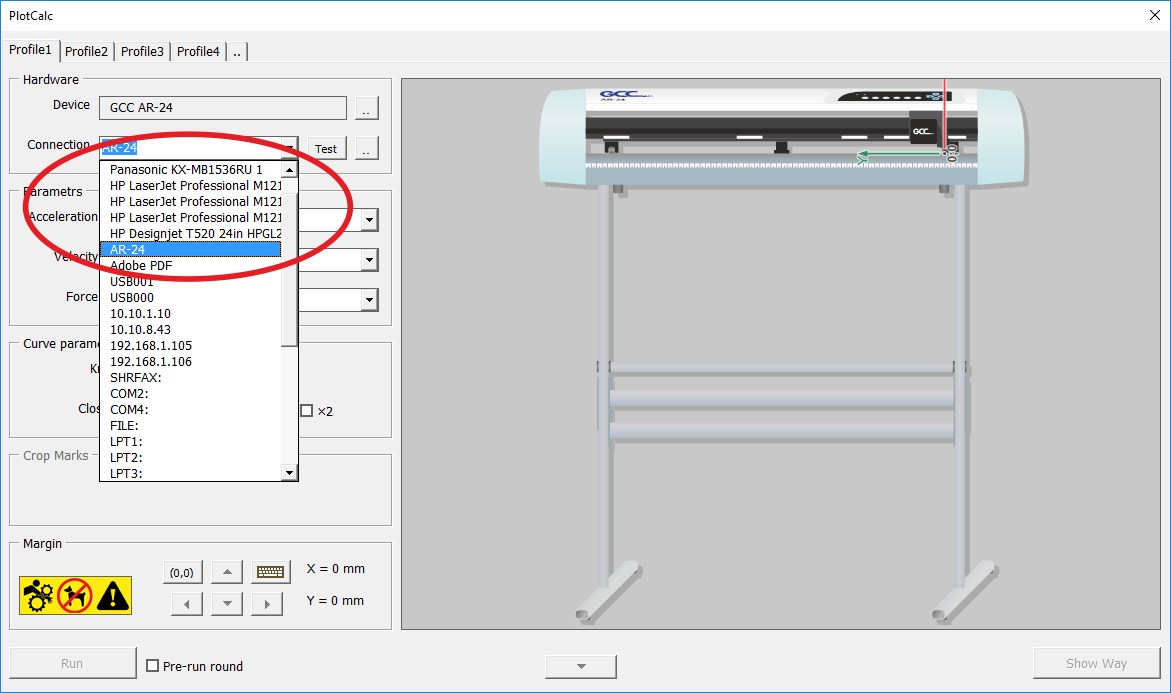
Connection to vinyl cutter [back] There are several ways to connect the vinyl cutter: 1. Connecting with a driver (like a printer) 2. Connection Without Driver (USB–USB) 3. Connection via COM port (USB-COM or COM-COM) 5. Connection via Wi-Fi or Ethernet Connecting using a driver (like a printer) 1. Install the driver for your vinyl cutter. If you are unable to find the native driver, you can find a suitable driver from another device, as they are all very similar. 2. In the cut output window, select the installed driver as shown in the screenshot below:
3. Turn on the vinyl cutter. 4. Press the Test button to test the connection to the device. The cutter carriage should make a slight movement.
Connection Without Driver (USB–USB)
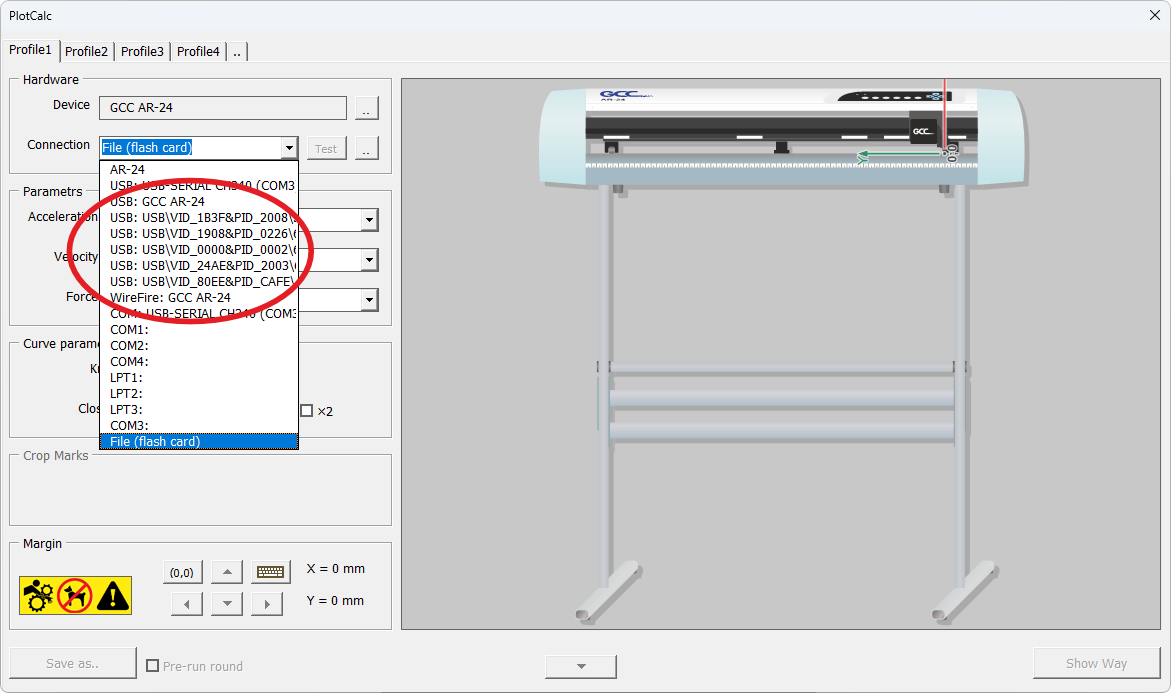
1. Connect the USB–USB cable. 2. In the output window for cutting, select one of the listed USB interfaces as shown in the screenshot below.
3. Turn on the cutting plotter. 4. To check the connection with the device, press the Test button. The cutting plotter carriage should move slightly.
Connection via COM port (USB-COM or COM-COM)
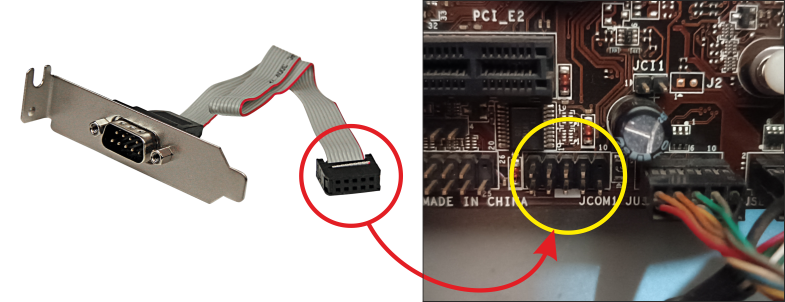
If your device has a serial COM port, you can connect through it for this purpose: 1. Connect a USB-COM cable if you are going to use a virtual COM port. 2. Install the driver for the virtual COM port, you can download it for example here (CH340.zip, 180 Kbytes) 3. After installing the driver for the virtual COM port, be sure to restart the operating system, otherwise the driver will not work. 4. In the cut output window, select one of the COM ports, such as COM1: or COM2:, or COM3:, etc. 5. Turn on the vinyl cutter. 6. Press the Test button to test the connection to the device. The cutter carriage should make a slight movement. It is also possible to connect using a standard COM-COM cable, for this purpose: 1. Buy a special expansion board for COM port output on the outside of the desktop computer case. 2. Connect it to the computer motherboard as shown in the photo below.
3. Connect the COM-COM cable to the vinyl cutter and computer (note that some COM-COM cables, despite having the same connectors, may have different pinouts and may not fit, in which case the cable should be replaced with another one). 4. In the cut output window, select one of the COM ports, such as COM1: or COM2:, or COM3:, etc. 5. Turn on the vinyl cutter. 6. Press the Test button to test the connection to the device. The cutter carriage should make a slight movement. Note When using the built-in COM port, unlike the virtual COM port, no drivers need to be installed.
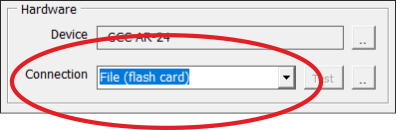
If your vinyl cutter has a flash drive connector, then you can cut directly through it, for this purpose: 1. In the cut output window, select File (flash card) (at the bottom of the list).
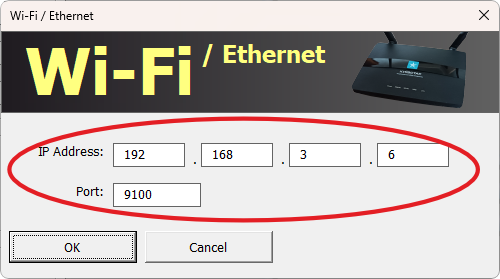
2. Save the cutting file to a flash drive (the file name should be named as specified in the vinyl cutter's instructions) 3. Insert the flash drive into the slot on the vinyl cutter and turn it on. Connection via Wi-Fi or Ethernet To connect, follow these steps: 1. Make sure the plotter is connected to your local network (via Wi-Fi or Ethernet cable). 2. Turn on the plotter. 3. In PlotCalc, select "Wi-Fi / Ethernet" from the menu. 4. In the settings, enter the plotter’s IP address and port number (usually 9100 or 8080, less commonly 23).
5. Click the Test button to check the connection with the device. The plotter's carriage should make a slight movement. Note You can find the IP address and port number in the plotter’s settings display. You can also access your router’s web interface to view a list of all devices on your local network — one of them will be your plotter, and its IP address will be shown there. It is also recommended to assign a static IP address to the plotter. The port number can usually be found in the user manual or asked from ChatGPT. See also Selecting a vinyl cutter model from the list of supported models and presetting it Vector drawing output to the vinyl cutter |
||||||||||||||||||||||||||||||||||||||||||||
|
|||||||||||||||||||||||||||||||||||||||||||||