|
|
|
|
|
|
|||
|
PlotCalc:
18.06.2026
PlotCalc 2026.06.18 [more..]
[Foison] [all list] |
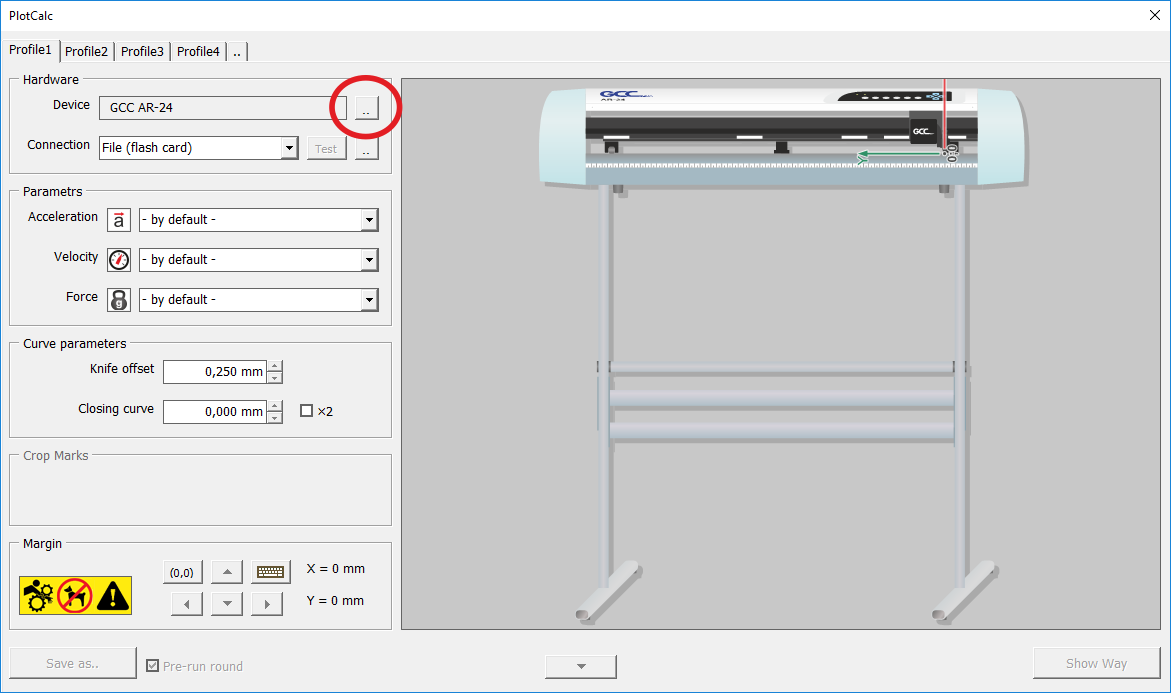
Selecting a vinyl cutter model from the list of supported models and presetting it [back] 1. Click on the button shown in the figure below to call the corresponding option
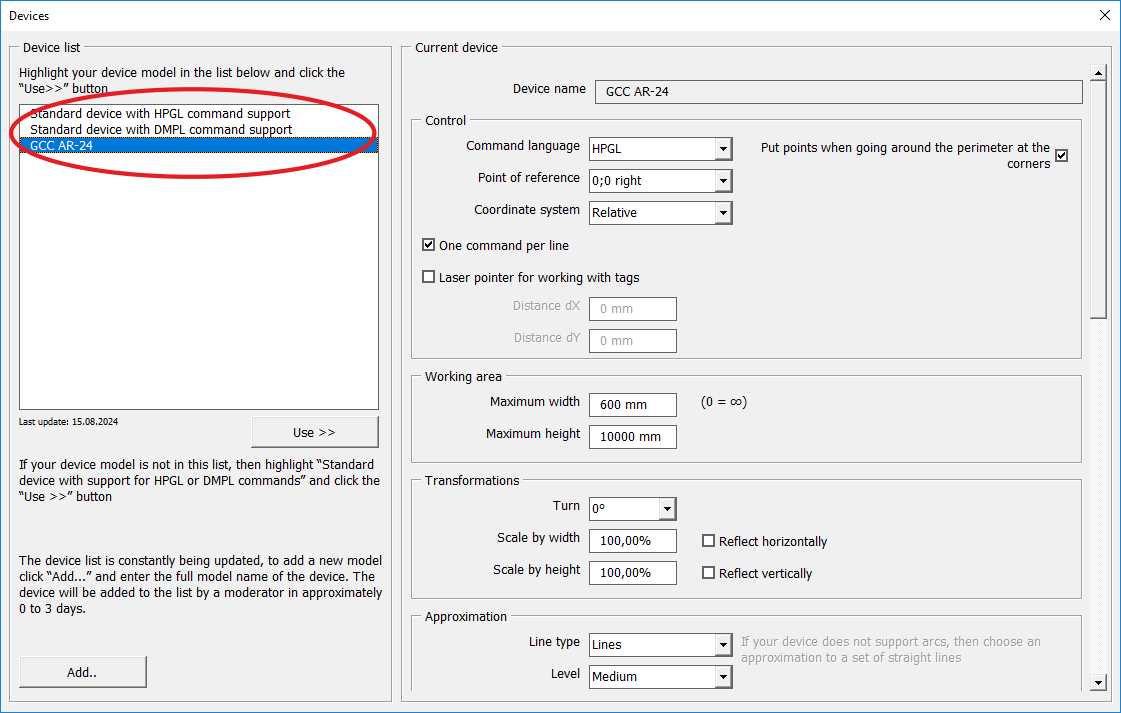
2. In the window that opens, locate and highlight your vinyl cutter model in the list box
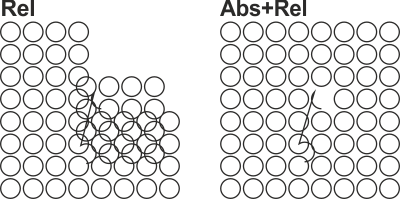
3. If you found your vinyl cutter model, highlight it, click Use >> and close the window 4. If your model is not in this list, click Add... and enter the full name of the vinyl cutter model, for example, GCC AR-24. Then click OK button, after a short while moderator will add your vinyl cutter model to the list. Notification of the addition will appear in the same window. Note You can also select the settings that are appropriate for your particular model of vinyl cutter by following the instructions below: 1. Select Standard device with HPGL command support if your vinyl cutter supports HPGL commands, or Standard device with DMPL command support if your vinyl cutter supports DMPL commands. 2. Click the Use >> button. 3. In the Reference Point section, select 0;0 right if the vinyl cutter carriage is on the right and cutting starts on the right, or 0;0 left if the carriage is on the left. Most vinyl cutters have the reference point on the right, some on the left, and rarely in the center. CAUTION: If you make the wrong choice, the pattern may be rotated 90°. 4. In the Coordinate System section, select an absolute or relative coordinate system. Absolute coordinate system is supported by all vinyl cutters, relative coordinate system may not be supported by some devices. Relative coordinate system allows you to reduce the file size by about 20% for vinyl cutter output without loss of quality. For example, a 10 mm diameter circle in the abolute coordinate system for HPGL takes up 1,110 bytes of memory and looks like this: And in the relative coordinate system it occupies 913 bytes and looks like this: If you don't know if your vinyl cutter supports a relative coordinate system, set it to absolute to begin with, and later, if everything is fine, try switching to relative. Note that if you select the relative coordinate system, the start point of each path will be transferred in the absolute coordinate system. This is done specially in case of an appartement failure in the vinyl cutter controller, because during cutting the film is electrified and if the equipment is not grounded, due to electrostatic electricity in the controller memory a false value can be formed, which will be displayed as a distortion of shapes. Schematic example of an appartement failure in a vinyl cutter controller:
This trickery minimizes material damage in the event of an appartement failure, as shown in the figure to the right. 5. The One command per line option is intended to save controller RAM, but is not supported by all devices. With this option enabled, the output file size was reduced from 913 bytes to 675 bytes without loss of quality. 6. Enable the Laser Pointer for working with tags option if you are using a laser pointer to position tags. Distance dX is the distance from the tip of the knife to the projected laser point along the OX axis Distance dY is the distance from the tip of the knife to the projected laser point along the OY axis 7. If you apply the Pre-run option before cutting to ensure that the vinyl cutter does not go out of bounds. The Put points when going around the perimeter at the corners option should be enabled if the controller does not trigger an error event when the carriage goes out of bounds, then when you go out of bounds some points will not be set and you will realize that the image is out of bounds and the output to the vinyl cutter should be canceled. 8. Working area Specify the dimensions of the working area of your equipment. You can also leave these values empty or equal to zero, but then PlotCalc will not warn you if the image is out of bounds.
9. Transformations There is a standard set of functions for transformation: rotation, scale and reflection. For example, scale can be used to adjust the size of shapes if your vinyl cutter distorts the size of the shapes: stretching or compressing vertically or horizontally, enlarging or reducing the size.
10. Approximation PlotCalc approximates Bézier curves into Lines or Arcs that the vinyl cutter works with. Lines are supported by all devices, while Arcs can be supported by many, but not all.
The arcs allow you to significantly reduce the output file size, the size decreased from 675 bytes to 63 bytes: If you don't know if your vinyl cutter supports Arcs, first set Lines and later, if everything is fine, try switching to Arcs. You can also adjust the approximation level, the higher it is, the more accurate the geometry of the shapes will be, but the output file size also increases. 11. Output file If your vinyl cutter supports cutting from a flash card, you can specify a file name for the output. You can also specify the maximum size of the controller RAM, then if the job exceeds this size, the cutting will be done piecemeal. It is possible to add some HPGL or DMPL commands to the beginning or end of the file, for example, a set of commands to cut the tape or rewind it. Before adding commands, it is better to do a preliminary test and debugging in console.
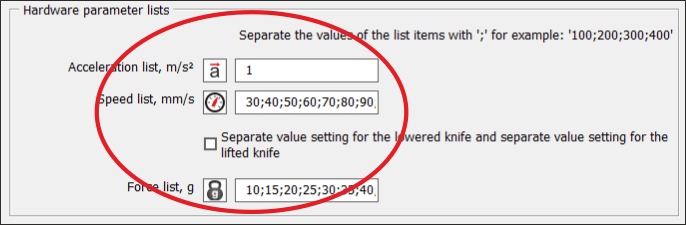
Acceleration list, m/s² - specify acceleration values separated by semicolons. Speed list, mm/s - specify velocity values, e.g.: 50;100;200;300 Separate value setting for the lowered knife and separate value setting for the raised knife - the option allows separate setting of carriage speeds, e.g. the speed for the raised knife can be increased to increase the productivity of the machine. Force list, grams - specify the film pressure force values in grams.
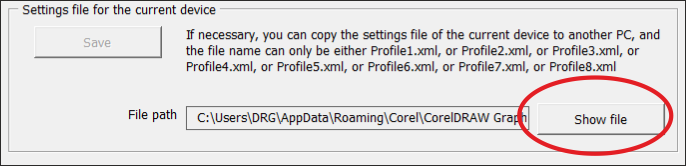
13. Settings file for the current device If you want to copy the current settings to another PC, you can find the file with these settings by clicking on the Show File button and copy it. Note that the files must be named Profile1.xml, Profile2.xml, Profile3.xml, Profile4.xml, Profile5.xml, Profile6.xml, Profile7.xml or Profile8.xml, other names are not allowed.
See also Vector drawing output to the vinyl cutter |
||||||||||||||||||||||||||||||||||||||||||||
|
|||||||||||||||||||||||||||||||||||||||||||||